


Calibrating a heavy duty pipe bender is a crucial process that ensures the accuracy and efficiency of pipe bending operations. As a leading supplier of heavy duty pipe benders, I understand the importance of proper calibration in achieving high-quality results. In this blog post, I will share some valuable insights on how to calibrate a heavy duty pipe bender effectively.
Understanding the Basics of Pipe Bender Calibration
Before diving into the calibration process, it's essential to understand the basic components of a heavy duty pipe bender. A typical pipe bender consists of a bending die, a clamp, a pressure die, and a hydraulic or electric power system. The bending die is responsible for shaping the pipe, while the clamp holds the pipe in place during the bending process. The pressure die applies force to the pipe to bend it to the desired angle.
Calibration involves adjusting these components to ensure that the pipe bender can produce accurate bends consistently. This includes setting the correct bending radius, angle, and pressure. Proper calibration not only improves the quality of the bends but also extends the lifespan of the pipe bender by reducing wear and tear on its components.
Pre - calibration Checks
Before starting the calibration process, it's important to perform a series of pre - calibration checks. These checks help identify any potential issues that could affect the calibration process or the performance of the pipe bender.
- Visual Inspection: Conduct a thorough visual inspection of the pipe bender. Look for any signs of damage, such as cracks, dents, or loose parts. Check the hydraulic hoses for leaks and ensure that all electrical connections are secure.
- Cleaning: Clean the bending dies, clamps, and pressure dies to remove any dirt, debris, or rust. A clean surface ensures better contact between the pipe and the dies, which is essential for accurate bending.
- Lubrication: Lubricate all moving parts of the pipe bender, including the hydraulic cylinders, bearings, and gears. Proper lubrication reduces friction and wear, which can improve the performance and longevity of the machine.
Calibrating the Bending Radius
The bending radius is one of the most critical parameters in pipe bending. It determines the shape and curvature of the bent pipe. To calibrate the bending radius, follow these steps:
- Select the Correct Bending Die: Choose a bending die with the appropriate radius for the pipe you are bending. The die should match the outer diameter of the pipe and the desired bending radius.
- Install the Bending Die: Install the selected bending die onto the pipe bender according to the manufacturer's instructions. Make sure the die is securely fastened and properly aligned.
- Test Bend: Take a sample pipe and perform a test bend. Measure the actual bending radius of the bent pipe using a radius gauge. Compare the measured radius with the desired radius.
- Adjustment: If the measured radius is different from the desired radius, make the necessary adjustments to the bending die. This may involve changing the position of the die or using a different die with a more accurate radius. Repeat the test bend until the desired bending radius is achieved.
Calibrating the Bending Angle
The bending angle is another important parameter that affects the quality of the bent pipe. To calibrate the bending angle, follow these steps:
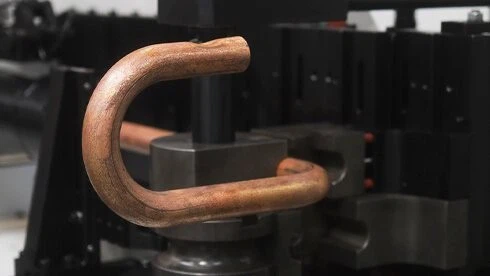
- Set the Angle Indicator: Most heavy duty pipe benders are equipped with an angle indicator. Set the angle indicator to the desired bending angle. Make sure the indicator is accurately calibrated and zeroed.
- Test Bend: Perform a test bend on a sample pipe. Use a protractor or an angle gauge to measure the actual bending angle of the bent pipe. Compare the measured angle with the desired angle.
- Adjustment: If the measured angle is different from the desired angle, adjust the angle stop or the hydraulic control system of the pipe bender. Some pipe benders allow for fine - tuning of the bending angle through a control panel. Make small adjustments and repeat the test bend until the desired bending angle is achieved.
Calibrating the Pressure
The pressure applied during the bending process is crucial for achieving a clean and accurate bend. If the pressure is too low, the pipe may not bend properly, resulting in a kinked or uneven bend. If the pressure is too high, the pipe may be damaged or deformed. To calibrate the pressure, follow these steps:
- Refer to the Manufacturer's Specifications: Consult the pipe bender's user manual or the manufacturer's specifications to determine the recommended pressure for the pipe material and diameter you are bending.
- Adjust the Pressure Relief Valve: Most heavy duty pipe benders are equipped with a pressure relief valve. Adjust the valve to set the maximum pressure to the recommended value. This helps prevent over - pressurization of the hydraulic system.
- Test Bend: Perform a test bend on a sample pipe. Observe the bending process and check the quality of the bend. If the bend is not satisfactory, adjust the pressure slightly and repeat the test bend.
Advanced Calibration Techniques
In addition to the basic calibration steps, there are some advanced techniques that can further improve the accuracy and performance of a heavy duty pipe bender.
- Using Laser Alignment Tools: Laser alignment tools can be used to ensure that the bending dies, clamps, and pressure dies are properly aligned. This helps reduce the risk of uneven bends and improves the overall quality of the bent pipes.
- Software - based Calibration: Some modern heavy duty pipe benders are equipped with software - based calibration systems. These systems allow for precise control of the bending parameters, such as the bending radius, angle, and pressure. They can also store calibration data for future reference.
Maintaining Calibration
Once the pipe bender is calibrated, it's important to maintain the calibration over time. Regular maintenance and inspection can help ensure that the pipe bender continues to produce accurate bends.
- Regular Cleaning and Lubrication: Clean and lubricate the pipe bender regularly to prevent dirt, debris, and rust from affecting the calibration.
- Periodic Inspection: Conduct periodic inspections of the pipe bender to check for any signs of wear, damage, or misalignment. Replace any worn or damaged parts promptly.
- Re - calibration: Re - calibrate the pipe bender at regular intervals or after any major repairs or component replacements. This helps ensure that the pipe bender remains accurate and reliable.
Conclusion
Calibrating a heavy duty pipe bender is a complex but essential process that requires attention to detail and technical expertise. By following the steps outlined in this blog post, you can ensure that your pipe bender is calibrated correctly and operates at its optimal performance.
As a supplier of heavy duty pipe benders, we offer a wide range of high - quality Automatic Tube Bender Machine, Stainless Tubing Bender, and Aluminum Tube Bending Machine. Our machines are designed to meet the needs of various industries and applications. If you are interested in purchasing a heavy duty pipe bender or have any questions about calibration, please feel free to contact us for further discussion and procurement negotiation.

References
- Pipe Bending Handbook: A Comprehensive Guide to Pipe Bending Techniques and Equipment.
- Manufacturer's User Manuals for Heavy Duty Pipe Benders.
- Industry Standards and Guidelines for Pipe Bending Calibration.